Today, crocheting is a very popular type of needlework: both among young people and older people. After all, using this technique you can make a lot of things, from a phone case or a stylish bag decorated with beads, to clothes and carpets. Even children can practice this art, because sufficiently large hooks are safe (compared to needles and pins). The mechanics of knitting develop fine motor skills and instill patience and perseverance, and the process itself calms and pacifies.
The undeniable advantage of crocheting is that, depending on the chosen yarn and hook, you can either quickly make a large-sized product (cloak, carpet), or create an airy, almost weightless web (napkins), or find a middle ground that is optimally suited for one or another target. This freedom justifies the wide application of this technology.
But no matter what product is knitted, the basic techniques remain the same. And the basic element in this type of needlework is a single crochet stitch. This is precisely the technique that is mastered immediately after a chain of air loops, without which, in principle, it is impossible to begin any work.
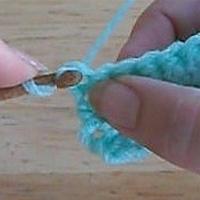
So, what is a single crochet stitch? In order to create it, you will need to cast on a chain of chain stitches (or already have a knitted fabric of some length). Knitting is done from right to left. Don't be confused by the photos in this tutorial. They are very good for a left-handed person, but a right-handed person must do everything in a mirror image.
If you are starting with a chain of stitches, you should insert your hook into the second (counting from the hook) loop. If you are starting a new row in an existing fabric, you should first cast on one chain stitch (a turn stitch, as experienced knitters often call it).
After this, you need to hook the working thread.

And pull it through the loop into which you threaded the hook in the first step.
After this, we grab the working thread again.


And we pull it through both loops on the hook.

The first single crochet stitch is ready. We continue further knitting according to the same pattern, inserting the hook into the adjacent loops of the base.
Single crochets can be knitted in three ways. The hook can be inserted under both half loops of the base (standard knitting). Either under only one - front or back (embossed single crochet). These options can also be alternated. Many knitting options are created precisely thanks to this technique (for example, elastic).
Thus, the single crochet stitch is the main technique of this type of knitting. All others with double crochets, etc.) are modifications of this one. If you master single crochets, then all other techniques will be quite easy for you. And using this technique alone, you can knit many beautiful and original things.
“Crochet” has prepared another lesson for beginners, and we will talk about single crochet - one of the simplest and most necessary elements. On diagrams it is usually indicated by a vertical stick or a cross - either x or +, and in the description it is abbreviated as st.b.n. It can be done in different ways, we will look at three - all of them are correct, but they are used for different purposes. And, of course, there will be additional interesting things for dessert. To view photos and diagrams in full size, just click on them.
As a basis, we will make a chain of air loops. Their number should match the number of columns we need plus lifting loops. How many of them are needed, we wrote in the material dedicated to. These are additional loops, they are knitted in the same chain and serve to move from one row to another.
How not to get confused about which loop to start knitting in
The first stitch can be knitted into either the second or third loop of the chain. This depends on whether the lifting loops will be taken into account when calculating - this is usually indicated in the diagram.
When knitting individual motifs - for example, leaves in Irish lace - the lifting loops are not taken into account in the total number and are used to round the element. In this case, only one loop is knitted for lifting, and the hook is inserted into the second loop from it. With this option, we will knit the last loop of subsequent rows in the last single crochet.

If you knit a straight fabric, the instep stitches replace the first stitch in the row, that is, they are taken into account when calculating their number. Then you should have a base loop and a loop of the next row, that is, two loops. Accordingly, you start knitting in the third loop from the hook. In this case, you subsequently knit the last loop of the row into a lifting loop.
Let's move on to the column itself. We pick up the working thread and pull it through the loop of the air chain. We should have two loops left on the hook. We pick up the thread and pull it through both - there is again one loop on the hook, and you can proceed to the next single crochet. Try not to pull the loops together when knitting - do not forget that in the next row the hook should fit into them without difficulty.
Front and back walls
Let's knit the first row to the end, perform a lifting loop to the next one and see what we got at the top. The columns we knit have two upper half-loops - they are called walls, or arcs. The one in front is called near, the second, of course, is called far. Where should you insert the hook to knit the next row? In different ways, we will look at all three options.
Under both walls
We insert the hook under both walls of the nearest column of the previous row. If you do the whole job this way, it will be quite dense. This must definitely be taken into account when choosing the type of knitting for your product. If the work curls a little, do not be alarmed - this is normal, it can then be easily steamed with an iron.
Important: in openwork patterns, when several columns are skipped, and one needs to be knitted with the column of the next row, this is the method used - under two arcs. If you tie it under one, it will stretch out and form a hole.
Under the front wall
If you knit under the front wall, the fabric turns out less dense. In this case, when turning the work, the front and back walls will change places, and as a result, the remaining unknitted arcs will create horizontal stripes in every second row.
Under the back wall
This knitting option is more voluminous. Your posts will remain slightly behind the piece. When you turn the work, this unevenness will turn its convex side towards you, and you will again knit the concavity in the new row. As a result, we get a horizontal elastic band. The fabric is the same density as when knitted under the front wall, and stretches well.
How to knit a single crochet stitch on an air loop (patent stitch)
The patent column is slightly higher than the usual single crochet; it corresponds to two lifting loops. Knit it as follows.
- We pull the thread through the loop of the previous row.
- We knit an air loop from the loop formed.
- We knit together both loops on the hook.
Step 1 Step 2 Step 3 Step 4
How to knit an even circle using single crochets
And for dessert - advice on how to knit a circle. To make it even, we apply the six sector method. We will knit six stitches of the first row on a sliding loop - each of them will become the basis for its own sector. Next, in each row we will add one column to each sector: in the second there will be only 12 of them, in the third - 18, in the fourth - 24, etc. To avoid confusion, count not the total quantity, but sector by sector: with each new row, one will be added to each sector.
We will talk about more complex and interesting crochet techniques in our next lessons.
Good afternoon, dear needlewomen!
Today we will talk about crochet for beginners, look at the basic aspects of crochet, and show you crochet patterns for beginners.
What is a hook
Hook- This is a tool that is used to knit products. On one side of the hook there is a head. It can be thick or very thin. The hook number depends on its thickness. If the thickness of the head is 1 mm, then this is hook number 1. You can see the hook number on the long part of the hook; the long part of the hook is called the shank.
The material from which hooks are made can be different - metal, plastic, wood...
threads for crocheting use wool, half-wool, cotton, synthetic.
How to crochet? Much easier than it seems. Let's train. We take threads of medium thickness, preferably single ones. And the hook is twice as thick as the threads. We sit down more comfortably, study the photographs and repeat.
How to crochet chain stitches.
Air loop:
Continue to crochet chain stitches in the same way. Make sure that your left thumb is always near the loop on the hook through which the thread is pulled. In this way you will get a chain of air loops. Air loops- This is the basis of all crocheted products.
What is a crochet yarn over?
Yarn over- this is a term without which crocheting will not work. When you put thread on a hook after there is already a loop on it, you are making a yarn over. Each yarn over forms a loop after you knit it.
Working thread- this is a thread coming from a ball.
We crochet a half stitch with double crochet.
To crochet a half-column, do this:

When starting to knit the first row of your product, you need to make several air loops of the chain, they are also called lifting loops. They replace the first column of a new row. Thus, a half-column corresponds to one air loop, a single crochet corresponds to two air loops, a single crochet corresponds to three air loops, a double crochet corresponds to four air loops.
How to crochet single crochet
Let's figure out how to knit a single crochet.

How to knit a double crochet stitch.
Dear craftswomen, let's learn how to knit double crochets.

We knit a double crochet stitch.
Now we know how to knit a stitch with one crochet, let's learn how to knit a stitch with two crochets.


Lush crochet post
Let's learn how to crochet a lush column.
- We pull several loops (4-6) 1 cm long from one loop. To do this, we make a yarn over, insert the hook into the chain of the previous row and pull out a loop, repeat this manipulation 4-6 times
- After you make the last yarn over, pull the yarn through all the loops and yarn overs on the hook.
- In order to secure the lush column, we put the thread on the hook.
- We knit a loop on the hook.
For more information about the lush column, watch the video
Crochet picot pattern
The picot crochet pattern is beautiful and very simple, crocheted this way:
- We knit three air loops
- Insert a hook into the last column
- We knit a single crochet.
Pico pattern crochet video
Text prepared by: Veronica
Feb 17
Crochet single crochet
In order to learn how to knit an element such as a single crochet, which is just part of the overall pattern of patterns, you will need: yarn and a hook, as well as a little patience.

- First, you must learn lessons on how to properly hold a hook, cast on the first loop, and knit a chain of air loops; we have all this on our website.
- After you have knitted a chain of air loops. Insert the hook into the second chain loop from the hook, yarn over the thread onto the hook, laying the thread so that it goes around the hook. Next, we pull the working thread through the loop.
- There are two loops on the hook, yarn over again and pull it through both loops.
- Single crochet is done, now insert the hook into the next chain stitch and repeat the second and third steps.
- Having reached the end of the row, knit a chain stitch (knitted like a chain of chain stitches), that is, simply yarn over the hook and pull it through the loop.
- Turn the work, insert the hook into the first loop of the previous row and work a single crochet.
- Having tied double crochets to the end of the row, repeat steps four and five until the product reaches the required height.
End of work
Once you have knitted the required number of rows, cut the yarn, pull it through the last loop and pull tight.
This is necessary to secure the thread so that the product does not become deformed and the loops do not unravel.
Single crochet behind the front wall

- Insert the hook into the loop of the previous row so that there is a thread on the hook that forms the front wall of the loop.
- Yarn over by placing the yarn around the hook and pull through the loop.
- Yarn over again and pull the yarn through both loops on the hook.
Single crochet behind the back wall

- Insert the hook into the nearest loop of the previous row so that there is a thread on the hook that forms the back wall of this loop.
- Yarn over the hook so that the thread goes around the hook and pull the thread through the loop on the hook.
- Yarn over and pull it through two loops on the hook.
In contact with
Classmates

»
Master class on knitting mittens using five stocking needles. Seamless circular knitting will help you create the perfect fabric. Let's consider the classic knitting method, which will be the basis for further variations of mittens.

»
Spring is a great time for updates and our men are no exception. How to update your wardrobe without much expense and please your loved one with a new thing created with your own hands. Such a set can be presented as a gift on Defenders of the Fatherland Day to one of your friends, close or not very close relatives.

»
Summer dress of a simple cut, a-line, with a geometric pattern in the form of an openwork insert. Thanks to the use of cotton yarn, a dress for a girl is light, soft, and thanks to the pattern of openwork inserts, it is very beautiful.
Crocheting is a whole world of needlework with its own rules and characteristics, once entered it is impossible to go back. This craft rewards craftswomen with beautiful and original things; you just have to learn its basics - stitch knitting.
In order to feel confident in the future, beginners need to learn how to crochet the simplest elements, which makes it possible to create fabrics of any complexity with a wide variety of patterns.
Master class for beginners on crocheting stitches
Any pattern created by crochet, from the simplest to the lush and openwork, is created by combining air loops and several types of columns. If you learn how to knit them perfectly, you can safely start crocheting things of any complexity.
What are the main types of crochet stitches?
- Single crochets;
- Double crochets;
- Half columns;
- Double crochets;
- Relief columns;
- Lush columns.
Single crochet

This type is considered one of the most used methods of knitting stitches - and therefore a basic skill necessary for all craftswomen. The method of crocheting single crochet stitches allows you to get a dense fabric of low stitches that is not highly elastic.
Popular articles:
This knitting technique offers several options for knitting loops: behind the front wall of the loop, behind the back wall and behind both walls. Depending on this, the pattern on the canvas will differ. Often knitting single crochets involves knitting a loop on both walls(in other words, for both half-loops of the upper braid) - this is the option that is often assumed in all knitting patterns. Let's considerhow to crochet a single crochet using the example of a step-by-step diagram:
We knit a chain of 20 chain stitches plus 1 lifting loop. We knit the first stitch into the second chain stitch from the hook. Insert the hook under the two walls of the loop, pick up the thread and pull it through the loop: two loops have formed on the hook (photo 1). Now we pick up the thread again and pull it through both loops. There is one loop left on the hook. We knitted a single crochet (photo 2).

Next, we knit the first row of stitches, but grab the air loop from the front wall - it’s more convenient to knit the initial row this way (photo 3). We turn the work over, knit one lifting loop, and then a row of stitches, picking up the loops on both walls.
In order for the edge of the fabric to be smooth, it is important to knit the first and last loops of the row correctly. Often, especially if they are knitted with thin threads, they skip the first loop of the row and the stitches of the next row are knitted directly into the second loop, or they forget to knit the last loop of the row. Be careful and count the bars while you study. You should always get 20 columns (lifting air loops are not included in this number) (photo 4).

Concerning two other ways of knitting single crochets, this is done as follows:

 Fig. 1: Picking up the front wall of the loop. Fig. 2: picking up the back wall of the loop.
 In any of the selected methods of casting single crochets, the first stitch in the row is always knitted on both sides of the loop so that the edge is smooth and quite dense.
Half column
Knitting with half-stitches or connecting stitches is not so common, since the fabric from these loops turns out to be very dense and stiff. The half-columns turn out to be very low. They are often used to connect fragments of lace sewing, move from one row to another when knitting in the round, and they are also used to secure and process the edges of the fabric at the final stage of knitting.
There are two ways to knit with a half-stitch:
- half crochet stitch - also called a strong stitch;
- half single crochet - that is, connecting.
Let's consider first, how to crochet a half double crochet.

Let's start by knitting a chain of air loops. The number of air loops should be equal to the number of half double crochets plus 2 loops for lifting. When the chain is ready (photo 1), yarn over the hook (photo 2),

insert the hook into the third loop of the chain from the hook (half double crochet corresponds to 2 lifting loops), grab the thread (photo 1) and pull out a new loop (now we have three loops on the hook) (photo 2),

grab the thread again (photo 1) and knit 3 loops on the hook in one step. It turned out half double crochet(photo 2).

We continue to knit a row of half double crochets. At the end of the row we knit 2 air lifting loops (these loops are the first half-column of the next row), turn our product over and continue knitting (photo 1). This is what the finished half double crochet looks like (photo 2).

Now we'll find out how to crochet half crochet or connecting stitch.

It is difficult to knit half stitches starting from a chain of chain stitches, so cast on 20 chain stitches plus 1 lifting loop and knit several rows with single crochets on both sides of the loop. Next, we will connect several rows of connecting posts.
A lifting loop is not required in this case. Therefore, having knitted a row of single crochets, we turn the work over and immediately knit a half-dome into the first loop. We insert the hook under both walls of the loop, pick up the thread and pull it through the loop and then immediately into the loop that is on the hook.
The half-column is knitted in one step - and so on until the end of the row. Turn the work over and knit the next row in the same way. To make knitting easier, do not tighten the loops, make them wide enough, especially for the first and last loops of the row.

Double crochet

The double crochet is considered one of the most frequently used elements among all types of double crochets. It is knitted quite quickly, and the stitch itself is twice as tall as a single crochet.
So, let's look at the step-by-step instructions how to crochet double crochet.
We knit a chain of air loops. The number of chain stitches should be equal to the number of double crochets plus 3 stitches for lifting. When our chain is ready, we yarn over the hook (photo 1), insert the hook into the fourth loop of the chain from the hook (a double crochet corresponds to 3 lifting loops), grab the thread (photo 2) and pull out a new loop, we now have 3 loops on the hook (photo 3) grab the thread (photo 4) and knit 3 loops on the hook in pairs in 2 steps, i.e. first we knit 2 loops (we will have 2 loops left on the hook) (photo 5) then grab the thread again (photo 6) and knit 2 more loops. This is how we did it double crochet (photo 7). We continue to knit a row of double crochets (photo 8). At the end of the row, we will knit 3 lifting air loops (they will be the first stitch for the next row), turn our product over and continue knitting (photo 9).

With two yarn overs

The double crochet stitch allows you to achieve a very high loop. This type of columns is used to obtain openwork free canvases.
After a chain of chain stitches, the number of which should be equal to the number of double crochets plus 4 loops for lifting, make two yarn overs on the hook (photo 1), insert the hook into the fifth loop of the chain from the hook (a double crochet corresponds to 4 lifting loops), grab the thread (photo 2) and pull out a new loop, we now have 4 loops on the hook (photo 3). We grab the thread (photo 4) and knit 4 loops on the hook in pairs in 3 steps, i.e. first we knit 2 loops (we will have 3 loops left on the hook) (photo 5) grab the thread again (photo 6).

and knit 2 more loops (we will have 2 loops left on the hook) (photo 7), grab the thread again (photo 8) and knit the remaining 2 loops. We knitted a double crochet stitch (photo 9). We continue to knit a row of double crochets (photo 10). At the end of the row we will knit 4 lifting air loops, turn our product over and continue knitting.

Raised
A very beautiful type of crocheted posts that allow you to achieve a convex texture of the fabric - a relief crocheted post. Ornaments and patterns are knitted with similar columns. And although the embossed column resembles a simple double crochet in execution, it has its own characteristic features. It differs in the way it is attached to the posts of the previous row: the embossed column is not knitted through the loops of the previous row, the hook is inserted under the columns themselves. In addition, it is important to remember that you begin to knit embossed stitches only after you have made at least one row of double crochets or a simple stitch.
There are two types of relief columns:
- embossed face columns located in front of the work - "convex";
- embossed purls located behind the work - "concave".
How do they differ and how to crochet them? Let’s look at step-by-step methods of knitting in photo tutorials.
Convex relief columns

We knit two rows of simple double crochets. Then we yarn over the hook (photo 1), insert the hook from the front side from right to left, under the double crochet of the previous row (photo 2), grab the thread (photo 3), and pull out a new loop (there will be three loops on the hook) (photo 4 ), then knit as a regular double crochet, knitting loops in pairs in two steps, i.e. grab the thread and knit two loops, grab the thread again and knit the two remaining loops (photo 5). When crocheting a double crochet “before work”, such a stitch is called a raised knit stitch or “convex stitch”.

Concave relief columns

We make a yarn over (photo 1), then we insert the hook from the wrong side from right to left (photo 2), clasping the leg of the double crochet of the previous row (photo 3), grab the thread (photo 4) and pull out a new loop (photo 5). We knit the loops in pairs in two steps, as when knitting a regular double crochet, i.e. grab the thread and knit 2 loops, grab the thread again and knit the 2 remaining loops (photo 6). When crocheting a double crochet “at work”, such a stitch is called a relief purl or “concave”. Similarly, embossed single crochets, embossed half double crochets, etc. are knitted.

Lush

Beginning needlewomen should definitely learn how to crochet a lush column. This type of columns allows you to achieve an unusually beautiful openwork relief pattern, which is also known as “puffs”. In addition, the final version is similar to the “bump” pattern. Lush columns are knitted with half double crochets, and the more half double crochets are knitted into one loop, the more magnificent the column. Lush stitches should be knitted using light and soft yarn, which will take much more to create this pattern than other types of stitches.
According to our scheme, we cast on a chain of chain loops, make a yarn over (photo 1), insert a hook 6 loops from the chain from the hook and pull out a long loop (there are now 3 loops on the hook) (photo 2), yarn over again (photo 3), insert the hook into the same base loop, grab the thread and pull out another long loop (we have 5 loops on the hook) (photo 4), yarn over again (photo 5), insert the hook into the same base loop, grab the thread and pull out another one again a long loop (there are now 7 loops on the hook) (photo 6). Next, we grab the thread (photo 7) and knit all the loops on the hook in one step (photo 8). The result was a magnificent column. Next, tie 2 ch. (according to the diagram) and knit lush columns in the same way (photo 9).

Lush columns with a closed top
 Fig. 1 - lush columns with an open top. Fig. 2 - lush columns with a closed top.
 Sometimes lush columns are knitted with a closed top. They are knitted in the same way, only they are finished in 2 steps: we knit the same half double crochets, pulling out long loops, then we grab the thread (photo 1) and knit all the loops except the first working loop (2 loops remain on the hook) (photo 2), grab the thread again and knit the two remaining loops (photo 3), then knit 2 ch. and knit lush columns in the same way (photo 4).

Video lesson
Video tutorials will help beginners master the master class on crocheting stitches.
Video “crocheting stitches”


